
Pressure Washingvs Soft Washing: Stop Guessing. Pick the Right Method
Hot take: most “pressure washing damage” isn’t caused by pressure washers. It’s caused by someone treating every surface like it’s a driveway.
If you learn one rule, make it this: *the surface decides the method*, not your mood, not the nozzle you already have on the wand, and definitely not whatever your neighbor swears by. Dirt has a personality. Materials have limits. Your job is matching force and chemistry to both.
One-line truth:
Soft washing is usually the safer default.
So what’s the difference, really?
Pressure washing cleans mostly by impact. A narrow stream of water hits the surface hard enough to shear off grime, mud, loose paint, even some biological growth. It’s mechanical removal. It can be fast and satisfying…and it can also carve a nice little story into wood grain if you’re careless. If you want a deeper breakdown of the process, How Professional Pressure Washing Works explains it well.
Soft washing cleans mostly by chemistry. You apply a cleaning solution at low pressure, let it dwell, and rinse gently. The solution breaks down organics (algae, mold, mildew), oils, and biofilm so the rinse can carry it away without you blasting the surface to pieces.
Here’s the part people skip: soft washing isn’t “just low pressure.” It’s low pressure plus the right mix, dwell time, and rinse strategy. Without that, you’re just…spraying water politely.
The decision isn’t complicated, but it is specific
Look, I’ve seen folks spend hours arguing PSI numbers while ignoring that the siding is oxidized and the paint is already half-detached. You don’t choose a method by reading the machine label. You choose it by evaluating the substrate.
Start with three questions (then stop overthinking it)
- How fragile is the surface? (soft wood, old paint, aged stucco, roofing materials = fragile)
- What kind of dirt is it? Organic growth behaves differently than mud or rust.
- What happens if you’re wrong? Etching concrete is annoying. Stripping paint or forcing water behind siding is expensive.
If the “wrong answer” costs you thousands, you don’t start aggressive.
A quick technical detour: pressure ranges that actually matter
Pressure washer output is often discussed in PSI, but flow (GPM) matters too. Higher GPM rinses better and can let you work at lower pressure. That’s why pros with high-flow machines can sometimes clean “hard” surfaces without cranking PSI into the danger zone.
A specific data point, since people love numbers: consumer pressure washers commonly run 1,300, 3,000 PSI; professional units often range 2,500, 4,000 PSI with higher flow. For surface cleaning standards and the injury risk that comes with high-pressure spray, OSHA has guidance on pressure hazards and PPE expectations (OSHA, “Hydroblasting” safety guidance and related high-pressure water hazards: https://www.osha.gov/).
No, that doesn’t mean “4,000 PSI is better.” It means “4,000 PSI is easier to misuse.”
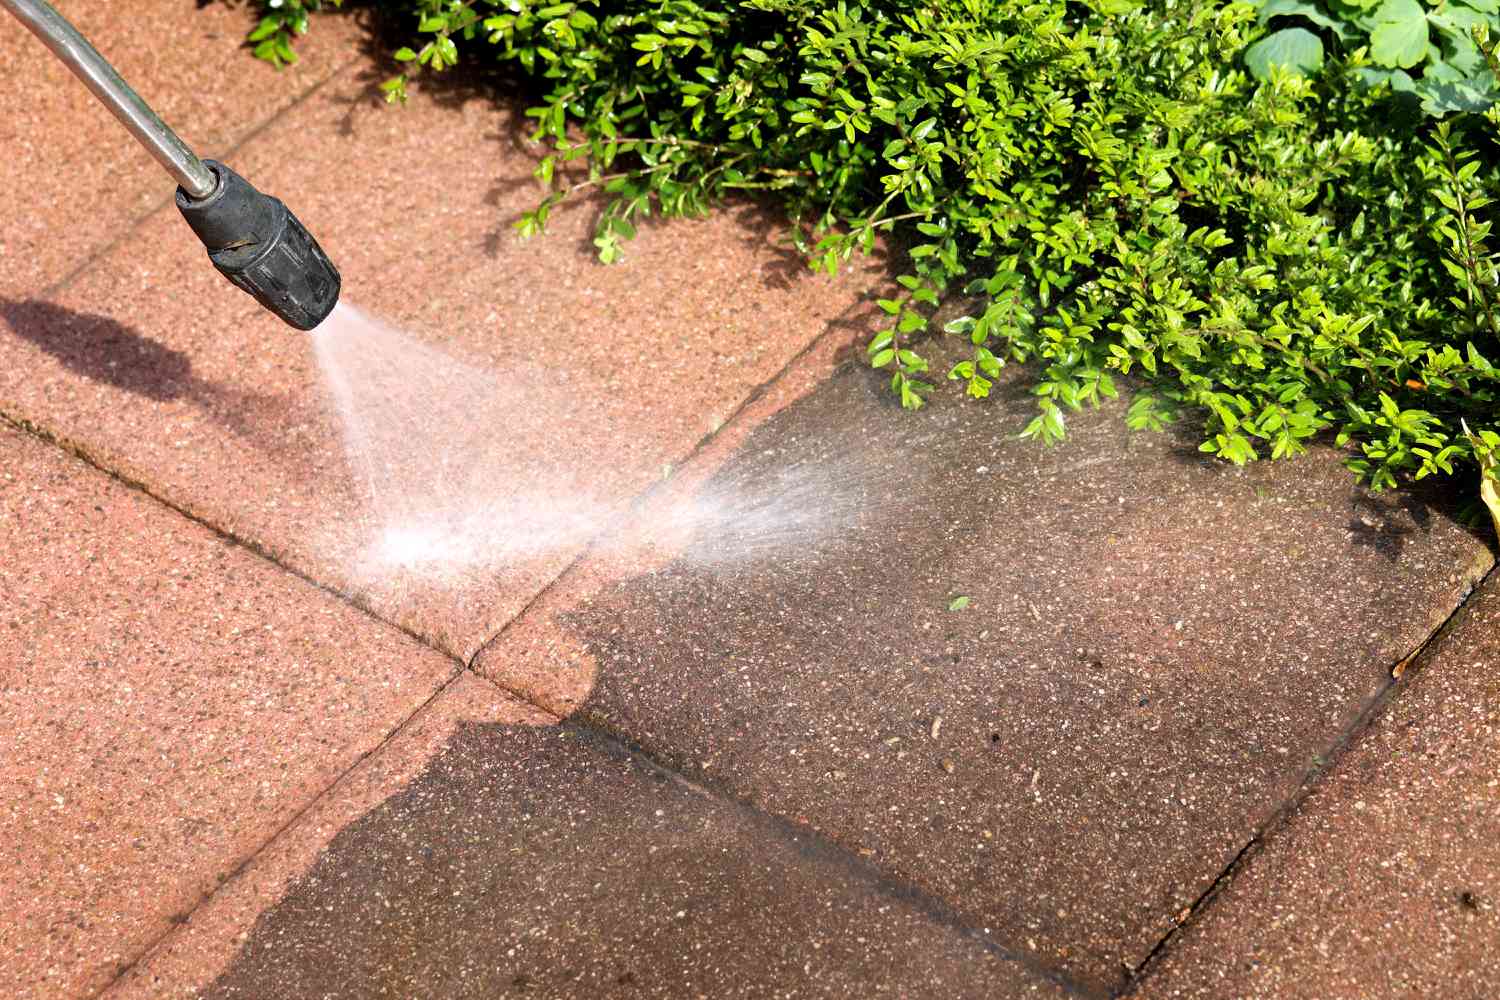
Pressure washing: when it’s the right tool (and it can be)
Pressure washing is a great fit when the surface is durable, the grime is embedded, and you need mechanical bite.
Good candidates:
– Concrete driveways and sidewalks (especially where dust and tire marks have settled in)
– Pavers and some stone hardscapes
– Brick in good condition (sound mortar, no crumbling joints)
– Shop floors, garage slabs, loading areas where grease and grit collect
In my experience, pressure washing also shines for “texture problems.” Think broom-finished concrete, rough stone, heavy aggregate. Those surfaces hold dirt like Velcro, and a soft rinse won’t always cut it.
Now, a caveat (because there’s always one): if the surface is already failing, spalling concrete, soft mortar, loose joints, high pressure can accelerate the failure. You’re not cleaning at that point. You’re renovating with water.
Soft washing: the best choice more often than people admit
If you’re dealing with organics, algae, mildew, mold, moss, soft washing usually wins. Why? Because pressure alone tends to *remove the symptoms* while leaving the *root* (the microscopic stuff clinging in pores and texture). Then it comes back faster than you’d like.
Soft wash sweet spots:
Siding.
Roofs.
Stucco.
Painted surfaces.
Yes, even “tough” siding sometimes needs soft washing because the issue isn’t stuck-on dirt. It’s biology. And biology responds to chemistry.
Surfaces that practically beg for soft washing
Vinyl siding, fiber cement, painted wood, older stucco, decorative masonry, gutters, screens, fencing, and anything with a finish you’d prefer not to strip off (which should be…most things).
Also: if landscaping is tight to the house, soft washing gives you more control. Overspray from a pressure wand is chaotic. Soft washing, done correctly, is calmer and more targeted.
The stuff that gets homeowners in trouble (and how pros avoid it)
Here’s the thing: the damage isn’t always immediate. You can gouge wood and not notice until it dries. You can force water behind siding and only discover it when a wall smells “off” weeks later.
Common mistakes I see:
– Using a zero-degree tip on anything you care about
– Getting too close (distance is a pressure setting; people forget that)
– Spraying upward under siding laps (hello, water intrusion)
– Assuming “more pressure” fixes slow results
– Skipping a test spot because “it’s just washing”
What I do instead (and what I’d recommend if you’re set on DIY): test an inconspicuous area, start gentler than you think, and work in controlled passes. If you’re feathering the trigger like you’re drawing calligraphy, you’re already in better shape than half the internet.
A slightly opinionated framework that actually works
If it’s painted, aged, soft, or layered, soft wash it first.
If it’s solid, monolithic, and uncoated, pressure becomes an option.
Then factor in the contaminant:
– Algae/mold/mildew: soft wash, proper dwell time, thorough rinse
– Mud/dust/pollen film: often soft wash is enough (surprising, but true)
– Oil/grease/rust: may need targeted chemicals + agitation + controlled pressure
– Chewing gum / heavy deposits on concrete: pressure + heat can help (if you know what you’re doing)
And yes, sometimes the answer is a blend: soft wash to kill and loosen organics, then a light pressure rinse to finish clean. That hybrid approach is normal on real jobs.
Prep, safety, and the environmental part people hand-wave
You’re not just cleaning a wall. You’re managing runoff, plants, overspray, and whatever your cleaner turns into after it hits sunlight and soil.
A few non-negotiables:
– Pre-wet and protect landscaping (plants don’t enjoy detergents, even “eco” ones)
– Don’t mix chemicals casually (bad reactions aren’t rare, they’re predictable)
– Watch wind direction; drift is real
– Control runoff near storm drains; local rules can be strict depending on where you live
Wear eye protection at minimum. High-pressure spray can inject water under skin in rare cases, and those injuries are serious. If that sounds dramatic, good, it should.
How long will it stay clean?
This won’t apply to everyone, but typical expectations look like this:
– Concrete/hardscapes: clean look can hold for months; heavy traffic areas re-soil faster
– Siding in humid/shaded zones: organic growth can return within 6, 18 months
– Roofs: soft wash results can last longer because you’re treating the biology, not just blasting it off
Climate, shade, and nearby trees change the timeline more than people want to admit. A north-facing wall under a canopy of oaks is basically an algae resort.
A quick checklist before you choose
If you want a simple “am I about to mess this up?” gut-check, run through this:
– Is the surface painted, sealed, oxidized, or older than you think?
– Does rubbing the surface leave color on your finger (chalky oxidation)?
– Are you seeing organic growth (green/black patches) rather than plain dirt?
– Is there any sign of loose mortar, cracked stucco, peeling paint, lifted siding?
– Would you be okay paying to fix it if you strip it, etch it, or flood behind it?
If any of those answers make you hesitate, soft washing isn’t the “wimpy” option. It’s the professional one.
Pressure washing is a scalpel in the right hands and a hammer in the wrong ones. Soft washing is slower, fussier, and usually smarter. Pick based on material and soil, test before you commit, and don’t confuse “aggressive” with “effective.”